
Why Your 1RM Matters (And When to Test It)
Most lifters program from an estimated 1RM they have never verified. That estimate becomes the denominator in every percentage the program prescribes, and a 1RM testing off by 5% quietly loads every working set wrong for the whole block. This article covers why a verified number is worth getting, what the test measures, when to time it in a training cycle, and how often to test by experience level. It does not cover the gym protocol, which has its own step-by-step guide linked below.
What Does a 1RM Test Actually Measure?
A 1RM test measures maximal muscular strength: the highest force your neuromuscular system can produce in a single voluntary contraction against an external load, under full technical control. That is narrower than most lifters assume. It is not power (which factors in velocity), not endurance, and not muscle size. The test isolates one quality and quantifies it in a single number.
Its validity as a strength measure is well established. A reliability analysis published in the Journal of Sports Science and Medicine found the 1RM test produces consistent, repeatable results across both trained and untrained subjects when the protocol is standardised. That reliability is what makes the number useful as a programming anchor rather than a one-off gym achievement.
1RM as a Measure of Maximal Muscular Strength
The test produces the number in two forms. Absolute strength is the raw load lifted; relative strength is that load divided by bodyweight, which is how lifters of different sizes are compared. Both reflect the contractile force the working fibers produce and the nervous system’s ability to recruit them at maximum effort.
Because the test needs full neuromuscular expression, anything that suppresses it on the day distorts the result. Fatigue, poor sleep, and inadequate fuelling all lower a tested 1RM below the true ceiling. That is why timing a test correctly determines whether the number reflects your strength or your recovery state.
Tested vs Estimated: When the Difference Actually Matters
An estimated 1RM from the calculator is accurate within about 5% for most lifters when the input is a 1-5 rep set. For everyday programming, that is close enough. The percentages it produces load your sets correctly within a margin most programmes absorb without issue.
A tested number matters when you need verified data rather than a close approximation: competition preparation where openers must be exact, evaluating whether a training block actually worked, or cases where your estimated and tested figures have diverged in the past. For the calculator’s accuracy limits in detail, see How Accurate Are 1RM Calculators?. For the full gym execution, the step-by-step protocol covers setup, warm-up, and safety.
Why Your 1RM Testing Matters for Programming
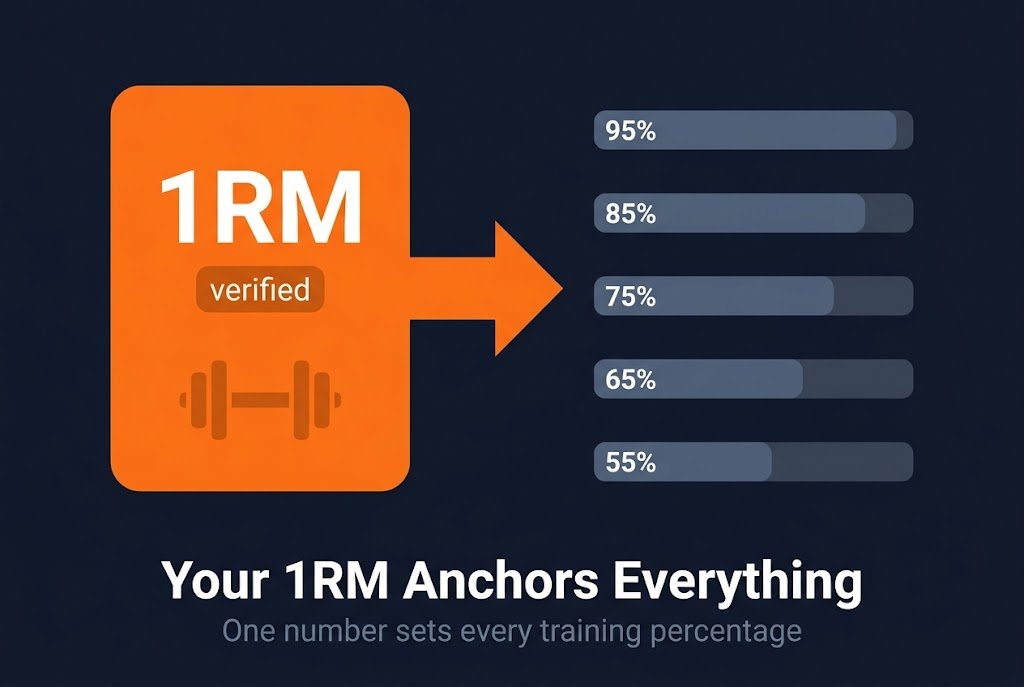
The 1RM is the denominator in every percentage a strength program prescribes. When the program says “3 sets of 5 at 80%,” the 80% means nothing until it is anchored to a number. Set that number wrong, and every working set across the block loads wrong, in the same direction, for weeks.
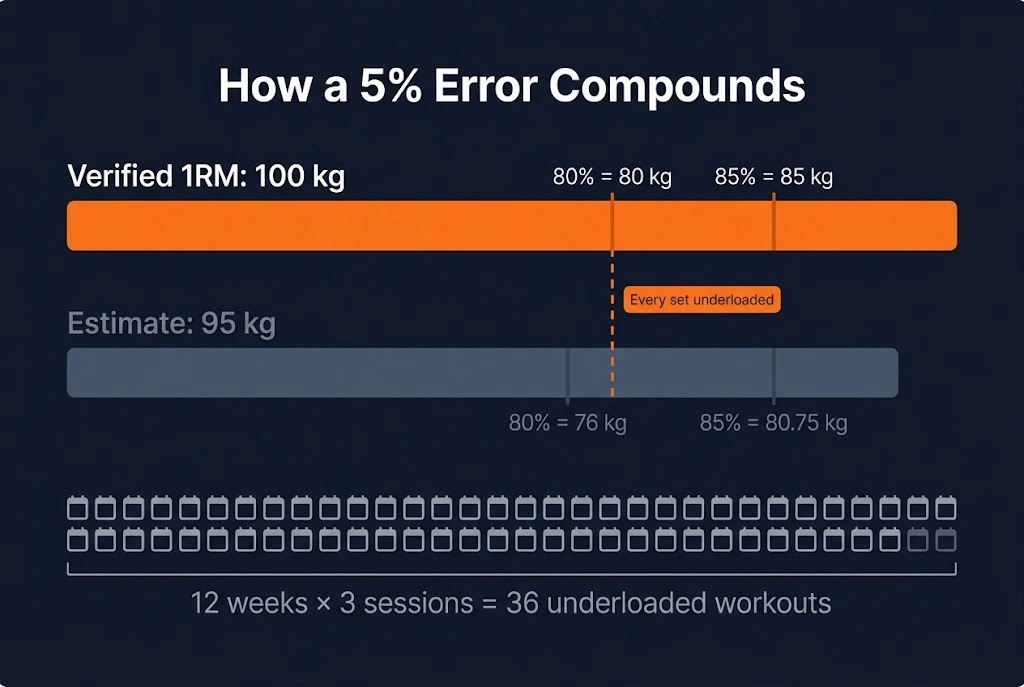
The error compounds because it is systematic. A one-off bad session affects one workout; a wrong 1RM affects every session built from it. An inflated estimate loads you above capacity and breaks recovery. An undertested number loads you below capacity and leaves adaptation on the table. Neither corrects itself. The two primary uses of the number, generating working weights and setting a training max, both depend on it being accurate.
How a Verified 1RM Anchors Your Training Percentages
The Percentage & Rep-Max Table generates a full load chart from one input. Feed it a verified number and every weight is anchored to real data; feed it a guess and every weight inherits the guess’s error.
Consider a 5% error. If your true 1RM is 100 kg but you program from 95 kg, every percentage is calculated off a number 5 kg too low. Across a 12-week block training three times a week, that is roughly 36 underloaded sessions, each asking slightly less than your body could handle. Small per session, meaningful across a block. For how a 1RM maps to other rep ranges, see Rep Max Equivalency.
The Training Max: What It Is and Why It Comes From Your 1RM
Many programs do not anchor to your true 1RM at all. Programs like 5/3/1 anchor weekly loads to a training max, typically 90% of the tested maximum. The buffer is deliberate: training at ceiling load every session prevents recovery and stalls the progression the program is built to deliver.
The training max only works if the 1RM under it is verified. An inflated estimate produces a training max above the lifter’s actual capacity, which defeats the buffer and breaks the progression model within a cycle or two. The Strength Training Programming guide covers how training maxes fit into a full program.
Test or Estimate? How to Decide
The question is not whether testing is good. It is whether a test is worth its cost right now. A direct 1RM test requires preparation, produces systemic fatigue, and needs planning into the training week. For most lifters most of the time, the calculator answers the same question far more cheaply.
The decision is a trade-off between data quality and recovery cost. When a close estimate is sufficient, estimate. When you need a verified number and the recovery cost is justified, test. The two conditions below make the call concrete.
When the Calculator Estimate Is Enough
Use the calculator when you are mid-block adjusting loads from session to session, when your input sets are in the 1-5 rep range and the estimate has tracked your performance, and when no competition or evaluation is coming up. A well-calibrated estimate from consistent 3-5 rep sets is reliable enough for ongoing programming in the large majority of situations, which for most lifters is nearly the whole training year.
When a Direct 1RM Test Is Worth It
Test directly in four situations: when you are ending a cycle and want to measure the block’s effect, when you are preparing for competition and need your openers verified, when your estimated and tested figures have historically diverged by more than 10%, or when you are starting a new program and want a clean baseline. In each case, the recovery cost buys data quality you cannot get otherwise.
Which Muscle Fiber Type Is Best for a 1RM Test?
Type IIx fast-twitch muscle fibers are the primary contributors to maximal strength output in a 1RM test. They produce the highest force in the shortest contraction time, which is exactly the demand a single maximum-effort rep places on the body. When you grind out a true one-rep max, Type IIx fibers do the majority of the work.
The other types play smaller roles at the top end. Type I slow-twitch fibers dominate sustained, lower-intensity effort and contribute little to a maximal single. Type IIa fibers sit between the two: they support near-maximal and higher-rep work, but they are not the primary drivers of a true 1RM the way Type IIx fibers are.
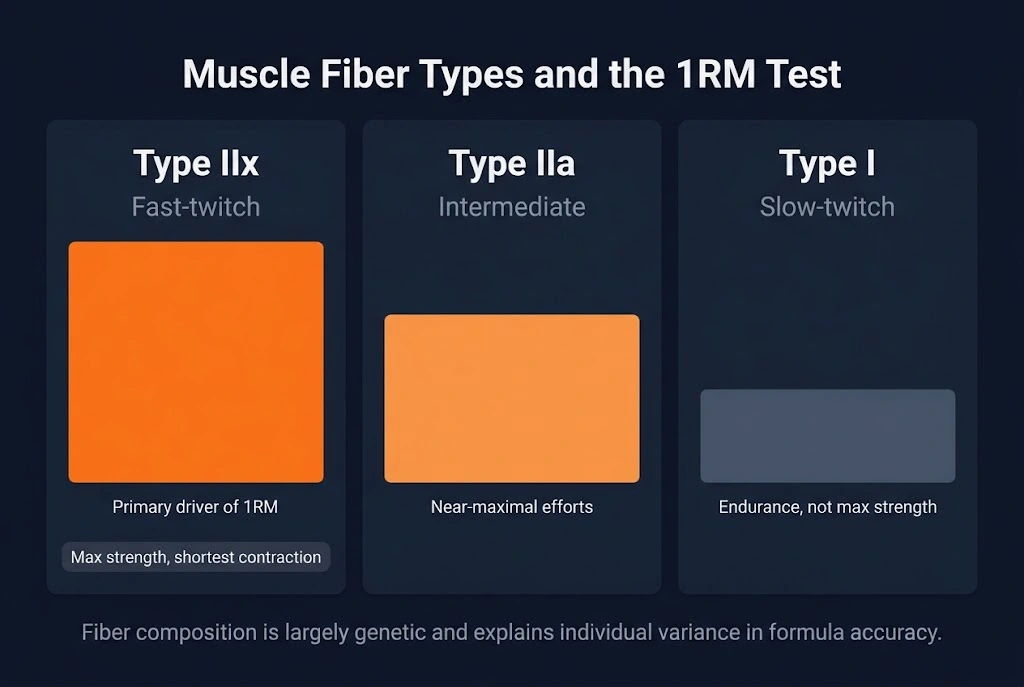
The practical consequence shows up in how well the calculator predicts your tested number. Fiber composition is largely genetic. A lifter with more Type IIx fibers often tests higher than their submaximal estimate predicts, because their strength peaks at the single-rep level rather than spreading across rep ranges. Their body is built for what the 1RM test asks.
What This Means for Your Test Results
This explains a common source of variance in formula accuracy. If your estimate consistently comes in below your tested 1RM, Type IIx dominance is a likely contributor: your strength concentrates at the maximal end, so a formula built on population averages underestimates your single.
The reverse holds too. Lifters who outperform predictions at higher reps but whose tested single lands near or below the estimate tend toward Type I and IIa dominance. Neither profile is better for overall strength. It simply explains why the same formula fits two lifters differently and why your own tested-versus-estimated history is worth tracking.
When in Your Training Cycle Should You Test?
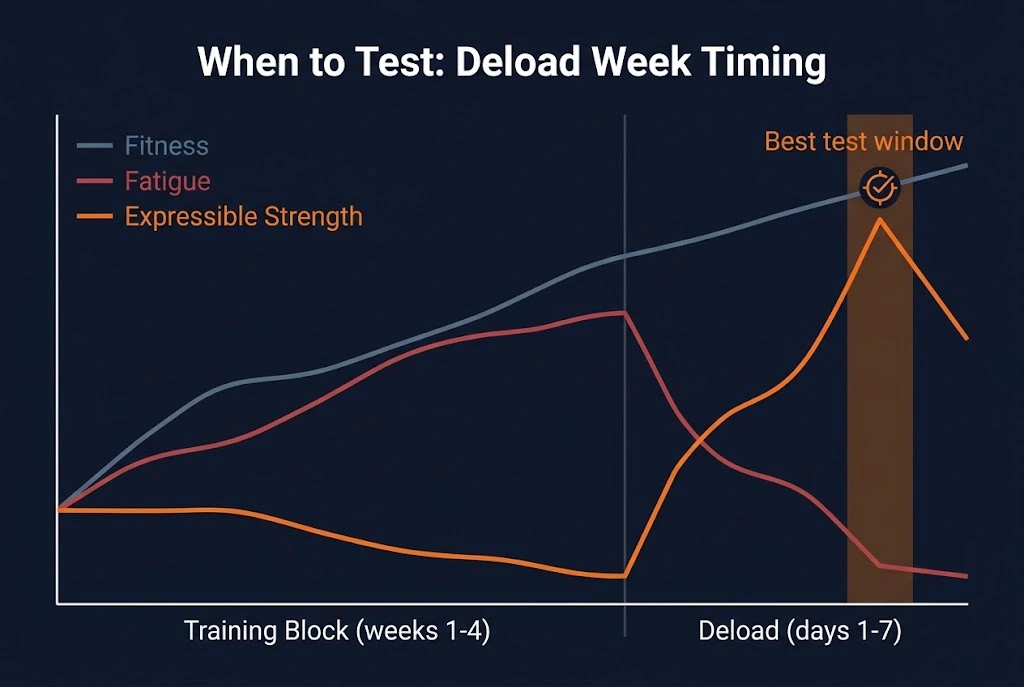
Test at the end of a training cycle, during or right after a deload week, when accumulated fatigue has cleared and neuromuscular performance sits at a temporary peak. This is the window where a tested 1RM reflects your true ceiling rather than your current fatigue level.
The two common mistiming errors both suppress the result. A mid-block test, run while you are still accumulating fatigue, produces a number below your actual ceiling; a test crammed in after a heavy week does the same. Both make your strength look worse than it is and anchor your next block’s percentages too low. Treat the test as a scheduled deload-week event, not a spontaneous gym decision.
After a Deload: Why Timing Determines Test Quality
The mechanism is that fatigue masks fitness. During a block, strength gains and fatigue rise together, and the fatigue suppresses your expressible strength. A mid-block test shows a number below the fitness you have actually built, because CNS recovery is incomplete.
A deload of 5-7 days at reduced load lets fatigue dissipate while fitness remains, leaving a clearer expression of your true capacity. A test on day 5-7 of a deload catches this window, which is why it produces the most accurate result of any point in the cycle.
What to Do If Your Training Program Doesn’t Have a Planned Deload
If your program has no formal deload, build a short taper before testing. Take 3-5 days of reduced-load training first: lighter weights, fewer sets, and the same exercises. This informal mini-taper clears enough accumulated fatigue to produce a meaningfully more accurate result than testing straight out of a heavy training week.
How Often Should You Test Your 1RM?
Most intermediate lifters should test every 8-12 weeks, once per training mesocycle. That cadence matches how fast strength actually changes and how long a typical block runs. Test much more often and you pay recovery costs for data that has barely moved; test much less often and you program from a number that no longer reflects your strength.
The right frequency shifts with training age, because both the rate of strength change and the reliability of a max attempt depend on experience.
Testing Frequency by Training Level
For beginners under six months of barbell training, direct testing is the wrong tool. The technique is not stable enough for a max attempt to give reliable data. Beginners should use the calculator with a 5-8 rep submaximal set instead, which gives a usable number without the technical demands of a true single.
Intermediate lifters, from roughly six months to three years in, are where the 8-12 week cadence fits best: one test at the end of each mesocycle. Advanced and competitive lifters test every 12-16 weeks, usually as part of a peaking cycle timed to a meet. At that level strength changes more slowly, and each test is planned around competition rather than a block.
Signs You Should Re-Test Earlier Than Planned
Three signals suggest your current anchor is stale. First, several recent working sets have beaten the rep predictions from your current max, meaning your true ceiling has risen. Second, you are starting a new program that needs a fresh baseline. Third, more than 16 weeks have passed since your last verified test, and the percentages no longer feel right in the gym. Anyone justifies testing ahead of schedule.
How to Use Your 1RM Test Result with the Calculator?
Once you have a verified 1RM, from either a direct test or a well-calibrated estimate, the next step is the Percentage & Rep-Max Table. Enter your 1RM, and it generates every working weight from 50% to 100%. Use the Training Max toggle to set your program’s anchor at 90%, 92%, or 95%, and read off each session’s loads directly.
Before building a full block from a fresh test, run one check: compare the table’s rep-max predictions against your recent training sets. If they line up with what you have been lifting, the result is sound. If they are consistently off, repeat the test before it anchors twelve weeks of work. Start from the one rep max calculator and enter your number.
Frequently Asked Questions
A tested 1RM is the most reliable foundation for percentage-based programming, but the number only helps if you get it under the right conditions and use it for the right reasons. Whether you test directly or lean on a well-calibrated estimate, knowing what the test measures, when to time it, and how often to repeat it is the difference between programming from real data and programming from a guess. Start with the One Rep Max Basics guide for the full picture, or go straight to the step-by-step protocol when you are ready to test, and check How Accurate Are 1RM Calculators? to decide whether you need to.